Before Christmas, I liked to have my students make these paper, stained glass windows. As they made them, we taped them to the windows. Almost every year, we filled the windows, allowing light to shine through, giving us a very colorful room. In one of my rooms, an old ag shop, a large building with huge windows on the north and south sides, the room was almost like a cathedral, when we had the windows filled. It was very warm and cheerful, almost breathtaking, on a sunny day. And, so sad after we took them all down when we left for the holidays. Usually, the paper was faded and the projects were filled with dust, by the time we were dismissed for Christmas. So, they ended up in the trash can. After we realized this would happen, I told students that they could make more than one. One to display, and one to keep. Some made several, just to make sure that the large windows were totally filled.
Besides filling our art room with these colorful windows, we sometimes shared them by taking them to the local nursing home and to the hospital, along with greeting cards, and little crafts we had made. The residents and patients really enjoyed having the students come to visit them and the colorful things for their rooms.
In order to share the project, my grandson and I are making examples, and I am scanning and saving the results. I do have one old photo that shows a few of the projects in our huge windows. Unfortunately, I didn't think of taking the picture when the sun was shining through the windows, but the focus was on our door decoration that year. You can see some of the "stained glass windows" in the back ground, filling the windows about half way up-as high as we could reach!
I would suggest that, if you would like to do this, and keep your project, you might use better quality paper. Construction paper does fade and become brittle easily. (Teachers use it because it is less expensive.) There are art or craft papers that would work for this. Use a heavy paper that has some body to it, and that says archival or acid free.
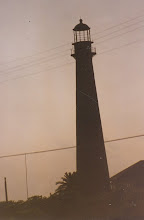
When teaching, I would try to find examples of stained glass windows to show students, and I would call attention to places in town where they might have stained glass windows. And we would talk about how the real windows are made. Usually, these would be in churches, but there are other buildings and homes that might also have such stained glass windows. Small stained glass projects such as boxes and light catchers for windows might be something that students could look at or may be familiar with.
In some situations, there might be budgets that allow for making actual stained glass projects. But, the cost, for most schools, is prohibitive, so we teach about them, and find ways to teach about the design, construction, and appreciation at a low cost.
Mock Stained Glass Windows
Materials
Black or dark colored construction paper (1 sheet)
colored tissue paper (assorted or pick the colors you like)
White crayon or white charcoal pencil
Elmer's or other white craft glue
Clear tape for hanging in a window
Old newspaper to protect work surface
Scissors
Alternate Materials
Black or dark colored construction paper (1 sheet) or larger black acid free paper
(You could do this very large, if desired)
waxed paper
iron
Old newspapers
Cup towels to protect iron (optional)
Crayon shavings
White charcoal pencil or white crayon
Craft or Elmer's glue
Scissors
(you can use a stencil or X-Acto knife for very delicate, precise cuts, on better paper)
Clear tape for hanging project in the window
Method
 1. Fold a sheet of black paper in half, vertically. ("Hot dog" style, for younger kids!)
2. If you want to make a very neat project, with a covered back, you can use two sheets of paper, folded together, for a backing, so that they will come out the same.
3. With the paper folded, use the white charcoal pencil, or crayon, to draw your design on the black paper. Remember that the paper represents the lead caming, or the black metal that holds the different shapes together. It shouldn't be too thick. The black lines should be fairly thin which would allow more of the color to show through, and also, if you think about a true stained glass window, too much lead would make the windows far too heavy. If it's too thin, of course the "lead" will not support the glass.
Also, remember not to cut the outside edges. That represents the edges of the window, the part that will go in the window frame and hold it all together. A small piece of tape can correct an accidental cut, possibly.
The design can be free form, a picture, a design using a symbol, etc. You can make them up as you go, or use a pattern that you have drawn, or even from something like an old Christmas card. It is much easier if you follow the KISS principal of keeping it simple, especially in your first few efforts.
The above design was drawn by my 10 year old grandson, using the white charcoal pencil shown. He chose to do a design using free forms.
4. The second design I am showing is an angel surrounded by shapes, suggesting a church window. This is the one that I am doing.
5. Cut out the inside of the shapes. Be sure to leave the "lead caming" to connect your shapes!
I used a small pair of scissors but my grandson improvised so he could get the scissors in easier. He had removed the blade from a pencil sharpener and he used this to put a small slit in each shape. (Be sure you use a pad of old newspapers under your work so that you do not cut your work surface!) A stencil knife might be better, or anything to make a small hole to put the scissors into easier. However, note that cutting construction paper with a stencil knife does not leave a smooth cut. There might be some ragged edges that will still need to be trimmed.
I tried my grandson's technique and it did work, but you lack the safety of a handle by using such a small blade.
6. After the shapes are cut out, you might save the inside shapes to be used for another design. My grandson liked his designs and wants to paint them on a t-shirt!
If you do this for a class, you might save all these little bits of paper to be used for things like paper mosaics.
7. Select colors of tissue paper that you like for your design. You can use large pieces, or cut each piece to go behind the shapes in your "window". You may, for example, prefer to use only certain colors in your design, or you might like to use any bright colors, or one color combination.
8. Use glue on the back side of your "lead caming" or strips between the "glass" shapes.
9. Place the colored pieces of tissue paper on the back of your "window" to cover each opening.
Note that, sometimes, there is a right and wrong side to the tissue paper. Hold it up to the light to find out which side will allow the most color through before you glue the shape in.
10. If you cut two pieces of construction paper, place the second sheet behind the first, then glue it into place. This will cover any ragged edges and make for a more finished look on both sides of the window.
11. Place the finished "window" inside a window in your home or building. Use clear tape to secure them. (Don't press the tape too hard or you will have a job cleaning off tape later!) Lights at night will shine through them so that people outside can enjoy them and, during the day, as the sun shines, those indoors will be able to enjoy the colors and designs.
Alternate Method
Follow steps above numbers 1 through 6.
7. Use two sheets of waxed paper, the same size as your black paper.
8. Place crayon shavings on one sheet of waxed paper. You can select colors or randomly arrange them on the waxed paper.
9. Put the second sheet of waxed paper on top of the sheet with the crayon shavings.
10. Place old newspapers on your ironing board or surface where you can iron.
11. Put the two sheets of waxed paper, with crayon shavings between them, on the newspaper padding. Add more sheets of newspaper to protect your iron.
12. Iron until the crayon melts and the waxed paper sticks together.
(If you accidentally get crayon on your iron, you can remove it with sandpaper, after the iron has cooled.)
13. Remove the waxed paper from the newspaper and place the waxed paper over the cut out paper "window".
14. Use white glue on the inside of the "lead caming" or areas of the construction paper to glue the waxed paper in place.
15. If you made double cut outs, glue the second window on the back to make a neater finished back of the project.
16. Tape in a glass window to show.
I seem to be having trouble with adding pictures again. I keep getting a message that it "cannot contact blogger" and then that it is "saving" . But, the pictures won't add. I will add those in a second post like I did with the last project.
Originally, I had tried another version of creating Mock Stained Glass in which the instructions call for floating paper in trays of water with Wesson Oil to get the stained glass look. But, I didn't have the trays, and, in my experimenting, I just had a very oily mess! I don't recall what kind of paper it required, or the directions, but that might be something that others have had better luck with than I did. I know that you can marbelize paper with the oil, but, again, I didn't have the equipment for that, and I found that the projects with oil was too messy.
Enjoy!


No comments:
Post a Comment