 Holiday Project
Flower Pot Craft
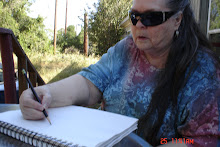
I was asked about craft projects that students might do for Christmas and thought I might share some of the things that worked well with my students and my children. I have a few photos to demonstrate what I am talking about.
This project is fairly easy to do and is something that might last for years to come. Kids, and adults, seem to enjoy doing them.
Materials
Assorted small clay flower pots (You can buy these at a garden center or craft store)
Strong white craft glue (I bought some from a hardware store that worked really well.)
Assorted acrylic craft paints
Small brushes (size will depend on the size of your pots)
mixing trays,
Water containers (I use clean, empty cans or plastic containers, or plastic cups)
waxed paper / newspapers to protect work area. Waxed paper keeps the bottoms from sticking to paper, if paint should drip.
Assorted trim
buttons, ribbon, wiggly eyes, lace, cotton balls, felt, rick rack, etc.
Crystal Clear Glaze or Clear Gloss Spray for finishing
Method
I always started out with one idea, but, as we worked, our projects might easily turn out to be something totally different! Sometimes, we had "happy accidents", or things would change our schedule, so that might change a project.
Originally, we were going to make Christmas characters like Santa Claus, angels, toy soldiers, and such. I did not intend to use a pattern and insist that everyone make the same thing. I would suggest something basic, and then we all took off in our own directions. Sometimes things came out like we intended, but usually, everyone had something very different and creative.
At this particular time, we started to make Christmas things, but we ran out of time, and ended up doing this for an Easter project! So, my pictures show bunnies and spring designs, rather than Christmas. But, you can get the idea of how to put these together for any holiday, even Christmas as I originally intended. We had characters, but some people made candle holders, candle sticks, or even just decorative sculptures.
1. Allow about 5 flower pots of varying sizes, to be stacked and made into a character or object.
2. Begin with one pot, upside down for a base, then reverse the next pot, and so on up to build on the base. The top pot might also be upside down, if you want to use that one for a head.
The top photo shows how you might stack the pots for a character, or sculpture.
3. Use white craft glue on the rim of each pot in order to stick them together, stack, and let them dry. Do not put glue on the bottom, where it will rest on the paper.
4. Place newspaper on your work area to protect it, then place a square of waxed paper on top. This should help to keep your project from sticking to the newspaper, and is easier to remove than painted paper, if your paint should drip.
5. Place small amounts of acrylic paint in the wells of a mixing tray. Styrfoam trays work well for this, as well as the little plastic trays made to hold paint. I like to keep my small bottles of acrylic paint in plastic buckets. I also like to use the buckets for trim, buttons, and even for larger containers of water.
6. Determine what character that you are going to make, and assemble colors that you might need for that character. If you need help in visualizing your character, you might find a picture of Santa or the character that you want to make. You could sketch it, and use pencil to draw lines on your pots to show where you want the parts to be in your painted version.
7. Use brushes and acrylic paint to paint your character or object on the pots. I like to start with a lighter color, and begin at the top. By starting with a light color, it is easier to cover up if you change your mind or need to correct something. I also like to start at the top and work down, although some people seem to prefer starting with the bottom and moving up. Larger areas of paint could be applied with a sponge or rag.
8. Let the acrylic paint dry thoroughly. Be careful because, sometimes, paint may appear to be dry on the surface, but have little pockets of wet paint underneath. You don't want your paint to be too thick. But, it does need to cover the pots.
9. In order to get a glossy finish, that looks like ceramics, spray your project with gloss spray. This is best done outside, with lots of ventilation. Do not try to use one or two thick coats. Instead, spray several light coats, allowing your project to dry in between coats. Let your project dry before the next step.
10. Use the white craft glue to add decorations. A white cotton beard, cotton for fur, buttons, ribbon, or whatever you desire to add to complete your character. You could use something like Super Glue, but be cautious when using this. Be very careful not to get it on anything where it should not be, like in your eyes or on your fingers.
11. If you want a nice finish on the bottom, you could glue a piece of felt on the bottom pot. This will protect furniture or shelves.
12. Some variations are, of course, various holiday characters, nativity scenes, candle sticks (you might be careful if you use the gloss spray on your candle sticks. I'm not sure if that might be a fire hazard. We never actually used candles in them, but, instead, put in candles for decoration only. No flame, just a candle in a holder. They also might be handy for things on a desk, kitchen decorations or holders for items like wooden spoons, etc.
If you like a little sparkle, you could add some glitter to your project. I think that glitter can get too messy, and, over the years, it doesn't look as fresh as it did when it was new. I try to add interest with more lasting, and neater, trim or with the paint itself.
I have more images to show the steps, but I seem to be having some trouble with blogger. I didn't post for several days, although I tried. One day, we had thunderstorms so the computer was unplugged. Then, I couldn't get an image to post. Next came problems with getting on the internet. And, now, I get a message, on and off, saying that it cannot contact blogger, then it says saving, so I don't know if I have a post or not. When I tried to add an image, it seemed to not do anything. I may have to add my other images in another post.
I did want to get something out. I wanted to remind everyone to send your drawings of your hand, if you would like for me to put them in a slideshow. Don't be shy! Since I am kind of behind on my posting, you have a little more time to work on it. Mine is a lot more complicated to draw now with so many tiny wrinkles!
I remember when older people would say to a child, "Can you believe that my hand used to look like yours!" I know I couldn't believe it, when they would compare their wrinkled, gnarled hands to my tiny smooth hand, with dimples. And, now, I look at a young grandson's hand, and say the same thing! All these tiny wrinkles that cover tiny scars, not to mention bigger joints and some joints that cave in instead of curving out. Hands certainly show something about the journey through life and the person. Someone once told me that I had the hands of a sculptor. A ballet teacher said that my hands, as a child, were very expressive. (She didn't mention my dancing, though!) I did like to do sculpture, including punching the clay. But, that became a bit painful in recent years. I couldn' t lift the heavy blocks of clay, or the kiln lid anymore so I had to stop the large heads that I enjoyed doing. In fact, I had to move to lighter weight projects that didn't require as much lifting, or cleaning. Before my hands became so wrinkled, I had a star shaped scar on the back of my hand. The result of the first fire ant sting that I ever had, back in the 70s when those critters first invaded this area. I was told that I was allergic to them, and had a bad reaction to it. I was also told that it was like an immunization and they shouldn't bother me anymore. That was not true! The stings still hurt and I had a violent reaction to multiple bites, at one time.
Your hand, too, can tell a story. So, send it along. I look forward to seeing your efforts. Send it as a jpeg file to the contact address in my sidebar.
Check out the links on my sidebar. Cecilia, the singer, has some new things, just in time for Christmas. Enjoy her work!


No comments:
Post a Comment